Description
Why Use Fibre Mesh at Masonry-Concrete Joints?
Masonry walls (brick or block) and concrete structural elements (columns, beams) are made of different materials, which expand and contract at different rates. This mismatch often leads to cracks where these materials meet – for example, where a brick wall joins a concrete column or beam. Cracks can also occur due to seasonal temperature changes, material shrinkage, and other construction factors. Such cracks are a common issue in house construction, including in Pakistan’s climate, and they can weaken plaster and look unsightly.
To prevent these cracks, builders install a layer of wire mesh or fibre mesh across the joint before plastering. This mesh reinforcement (fiber mesh or steel chicken mesh) ties the two materials together under the plaster. It distributes stress and movement across the joint so that the plaster doesn’t crack at the meeting line.
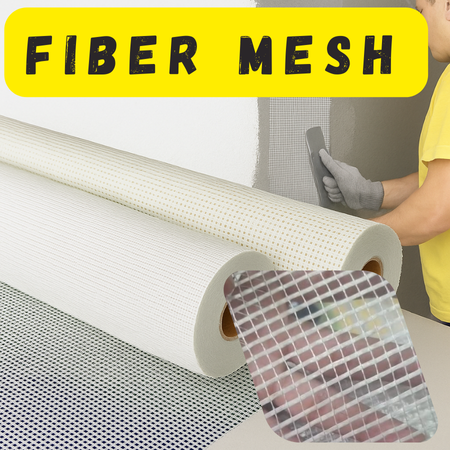
A role of fibre mesh is 3 feet 3 inches wide and 150 feet in length. You can buy a whole roll from us or you can also buy it in shorter length according to your requirements. We will not alter with the width. The price of one running feet which will be 3 feet 3 inches is Rs. 55 and buy a complete roll for Rs. 7,500
Fiber Mesh vs. Steel (Chicken) Mesh for Joints
Two popular options for reinforcing construction joints are steel wire mesh (often the hexagonal chicken wire mesh, locally known as Murga Jali) and fiber mesh (fiberglass mesh sheets or tape). Both serve the same purpose – reinforcing plaster at joints to stop cracks – but they have different features:
· Steel Wire Mesh (Chicken Mesh): This is a metal mesh with hexagonal or square openings. Steel mesh does provide reinforcement but if not properly galvanized, it can rust within the plaster.
· Fiber Glass Mesh: Fiberglass mesh is a modern alternative made of woven glass fibers. It is non-metallic, so it will not rust or corrode over time. Despite being lightweight, it has high tensile strength and is resistant to stretching or tearing. This means once embedded in plaster, it holds the plaster firmly and prevents cracks from appearing on the surface. It’s also easy to work with – you can cut it with scissors and it stays in place with minimal fixing, often self-adhesive or using plaster to hold it. Because it’s immune to alkali and moisture, fiberglass mesh won’t decay or weaken inside the plaster, making it a durable choice.
Benefits of Using Fibrw Mesh Reinforcement at Wall Joints
Fiberglass mesh is lightweight, does not rust, and provides strong tensile reinforcement to prevent cracks in plastered walls. Installing fiber or steel mesh at the masonry-concrete joints offers several clear benefits for home construction:
· Prevents Wall Cracks: The primary benefit is crack prevention. Fibre Mesh reinforcement prevents the development of cracks between wall and column/beam junctions. This means your walls won’t develop those diagonal or vertical cracks at corners and joints that often appear if mesh is not used. By avoiding cracks, you maintain both the strength and appearance of the wall over time.
· Stronger, Durable Plaster: The mesh makes the plastering stronger at joints. It acts like steel rebar does in concrete – holding the plaster together and improving its tensile strength. This added strength means the plaster can withstand small movements or settling of the building without crumbling. In the long run, this durability saves on repair costs and keeps the finish looking new.
· Better Bond Between Different Materials: Fibre Mesh creates a better bond between the masonry and concrete at the joint. By spanning both surfaces (half on the brick wall, half on the RCC column/beam), it literally ties them together under the plaster. This ensures the plaster grips onto both materials uniformly, reducing any separation. Essentially, the mesh helps the plaster adhere firmly to dissimilar backings, resulting in a more monolithic wall finish.
· Lightweight & Easy Installation: Fiberglass mesh are relatively lightweight and easy to handle. The mesh comes in rolls or sheets that a mason can cut and nail or embed as needed. This lightweight nature makes it easy to transport and install – even a single person can carry a roll of mesh on site. It does not add significant weight to the wall, but it adds a lot of strength.
· Affordable Solution: Using mesh is cost-effective. The materials are reasonably priced in Pakistan, especially considering the benefit they provide in preventing future damage.
· Corrosion and Rot Resistance: Fibre meshes are built to last. Fiberglass mesh is completely non-rusting and won’t decay. This means once installed and covered with plaster, the mesh will not deteriorate over time. You won’t have issues of mesh disintegrating or causing stains. This durability makes it a one-time solution – the mesh will perform for the life of the plaster.
Overall, fibre mesh reinforcement is a simple but highly effective technique to enhance wall performance. It’s an accepted best practice in modern construction to ensure crack-free, long-lasting walls.
Best Practices for Using Fibre Mesh at Joints
For those involved in building or even overseeing your own house construction in Pakistan, here are some practical tips (in simple terms) for using fiber or steel mesh at wall joints:
1. Identify the Key Joints: The mesh should be applied wherever a brick/block wall meets a concrete member. Common spots include the vertical joints where walls meet columns, the horizontal joints where walls meet beams or slabs (like at the ceiling line), and around areas where materials change (for example, at masonry to a concrete staircase or around embedded steel frames). Also consider mesh over door and window corners, and over chases or grooves (like where electrical conduits run) to prevent crack lines there as well. You can place fibre mesh where there is joint of old and new plaster.
2. Cut the Mesh to Size: Cut a strip of mesh that will cover the joint area. Ensure the mesh extends on both sides of the joint – a typical practice is to overlap about 2–3 inches (50–75 mm) on each side of the joint for a good grip. For example, if you’re placing mesh between a wall and column, part of the mesh should lie on the brickwork and part on the column so that both sides are tied together under plaster.
3. Secure the Mesh: Nail or fix it securely to the wall and column before plastering. You can use masonry nails, staples, or even tie it around rebar if any is exposed. The mesh should be taut and flat against the surface (no bulging).
4. Apply Plaster in Layers: Proceed with plastering over the mesh as usual. Typically, a scratch coat (first layer) will be applied, which embeds the mesh completely. Make sure the plaster mix properly covers the mesh. Then add one or more finishing coats to get an even surface.
5. Curing and Care: After plastering, cure the plaster as per standard practice (keep it moist for a week or so). Proper curing will also help prevent cracks. The mesh will do its part by holding the plaster together while it gains strength and even after.
By following these practices, both professionals and non-professionals can ensure that the fibre mesh is used effectively.
Conclusion
Mesh reinforcement at masonry-concrete joints is a simple, inexpensive, yet highly beneficial technique for anyone building or renovating a house in Pakistan. It addresses a common problem – cracks in walls – by adding a layer of strength and flexibility at the right place.